Binance Network Unavailable
Binance networks: BEP20 and BEP2 recovery guide
How to recover unsupported BEP20 and BEP2 tokens sent to your Exodus wallet.
In this article:
- How is it possible to send to the incorrect accost?
- Recover your BEP20 asset sent to your Exodus accost
- Tutorial video: BEP20 recovery
- Part 1: Getting and setting up the Binance wallet
- Part 2: Importing your private primal into the Binance wallet
- Part 3: Calculation a custom token to the Binance wallet
- Function iv: Sending your BSC funds out of your Binance wallet
- BEP20 token sent to Exodus Mobile
- BEP20 token sent to Trezor
- BEP2 token sent to Exodus Desktop
- BEP2 token sent to Exodus Mobile
How is it possible to ship to the wrong address?
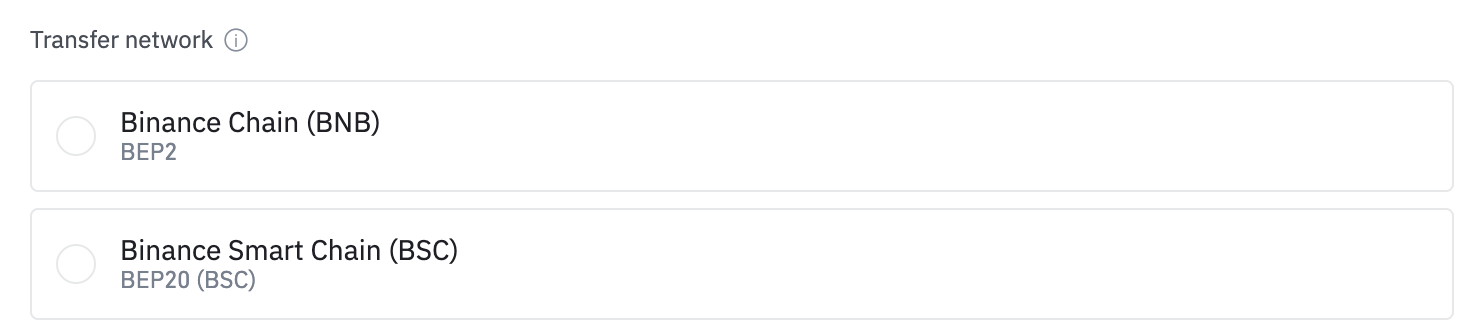
Binance operates two token standards: BEP2 on the BNB Beacon Chain network every bit well every bit BEP20 on the BNB Smart Chain network.
As a result, many assets, such as Ethereum (ETH), Tether (USDT), or Cardano (ADA), now have a BEP2 and a BEP20 version that yous can withdraw from Binance, every bit well as other platforms that support the BEP2 and BEP20 networks.
What this means is that it is possible to accidentally choose the wrong network when withdrawing your asset out of Binance (and other platforms that support these networks) to your Exodus wallet address because nosotros don't support all BEP2 and BEP20 assets.
Currently, the but assets supported on BNB Smart Chain (i.e. BEP20 tokens) are BSC BNB (BNBBSC), PancakeSwap (Cake), USD Coin (USDC), and Shiba Inu (SHIB). On BNB Buoy Chain (i.east. BEP2 tokens) the only assets we currently support are BNB (BNB) and Binance USD (BUSD).
Please do not worry if you accept sent an unsupported BEP20 or BEP2 asset to Exodus! This commodity volition show you lot how you can retrieve your BEP20 and BEP2 assets sent to your Exodus wallet.
Additionally, Binance recently announced that information technology was supporting Ethereum (ETH) withdrawals on Arbitrum Ane, a pop layer 2 scaling solution. Currently, we only support ETH on the mainnet Ethereum network. If you have sent ETH or some other asset using the Arbitrum network delight read this guide to retrieve those assets.
Recover your BEP20 asset sent to your Exodus address
Tutorial video: BEP20 recovery
Here is a video guide that volition take you through Parts 1 - 4 of recovering your assets via the Binance wallet. The Binance wallet is our recommended option of BEP20 asset recovery considering the procedure is easier for near users. There are stride-by-stride instructions beneath.
Role ane: Getting and setting upwardly the Binance wallet
Retrieving your Binance BEP20 assets will require the use of a desktop computer and the Binance wallet browser extension. If you already take the Binance wallet browser extension skip to Part 2.
- 1
-
Using a Chromium-based browser like Chrome or Brave (Safari will not piece of work) go to the Chrome Web Store. In the acme left corner search for the Binance wallet.
-

- 2
- Click on the Binance wallet. From there click Add to [browser] to add information technology to your browser equally an extension.
-

- 3
-
Once done, it should look similar this in your browser. From here you lot tin create a new wallet and go the 12-word secret recovery phrase, click on Create wallet .
-

- iv
-
To view the 12-give-and-take secret recovery phrase of your newly created wallet, click on Generate seed phrase .
-

- 5
-
Follow the instructions to create a stiff countersign and click Continue .
-

- 6
-
Write downward your 12-discussion secret recovery phrase, and store it in a safe place offline. Then click Go along .
-

Continue to Part 2.
Part 2: Importing your individual key into the Binance wallet.
If yous already have the Binance wallet start here.
- 7
-
Next, you'll need to think the private primal from the wallet where you accidentally sent the funds. Navigate to this wallet in Exodus.
- 8
-
Please copy the private key from the wallet within of Exodus. Here's how you lot tin obtain your Private Central: How practise I view my private keys?
-
Please be careful with your private keys! Anyone who has your private key can control the funds on information technology; therefore, do not import your private central into any platform that you do not 100% trust. To find out how to proceed your money condom please bank check out this article from our Knowledge Base of operations.
- 9
-
Open Binance wallet and click on the symbol in the height right corner.
-

- ten
-
This volition open up some other menu. Click on Import Business relationship
-

- 11
-
Import your copied private cardinal by pasting it where it says "Paste your Private Key String Here" and and so click Import .
-

- 12
-
You'll at present see this account in the drop-down card with the bluecoat Imported. Click on this account.
-

- 13
-
Your BSC tokens should at present announced.
-

-
If your token does appear, skip to Part iv. If your token doesn't appear, y'all might need to follow the steps to add a custom token in Role 3.
- xiv
-
If your tokens did non appear in footstep 13, click the + sign. If your token did announced in the final step, skip to Part 4.
-

- 15
-
Select Custom Asset .
-

- 16
-
Y'all volition need the token contract address. To observe the contract accost:
- Open up the BSC token list to discover the token y'all sent and click on information technology.
- Under Profile Summary, you volition come across Contract. Copy the contract address.
-

- 17
-
Back in the Binance wallet, paste the token's contract address in the Contract Accost field, and the balance of the information will populate automatically. So click Add together Nugget.
-

-
You should now see your BSC tokens appear. Continue to Part 4.
- eighteen
-
You'll need to eolith some BNB Smart Chain BNB (BNBBSC) before you lot tin can move the tokens out of your Binance Wallet. We recommend 0.002 BSC BNB as this should exist more than enough to embrace all transaction fees for this process. You can use Binance to purchase BSC BNB. When withdrawing BSC BNB to your Binance wallet, delight be sure to select the BNB Smart Chain (BEP20) network.
- nineteen
-
Now you'll be able to send your BEP20 tokens back to the wallet yous sent it from (such every bit back to Binance or the platform where you got them) and after that, send back the BEP20 BNB that you obtained in footstep 15.
- xx
-
Once the funds are back in Binance (or the originating platform), delight select the nugget's name/ticker as the network to withdraw to your Exodus wallet (not BEP20). Y'all tin can follow our guide here Binance to Exodus: Pace by Footstep
-

- 1
- Beginning, you lot'll need to download the desktop version of Exodus hither.
- 2
- Now y'all will demand to link your mobile wallet to the desktop wallet you lot just downloaded. To do this delight read this guide.
- three
- The rest of the instructions are the same every bit above in the Recover your BEP20 nugget sent to your Exodus desktop section.
- 1
- Become to MetaMask's website and install the mobile MetaMask wallet. Tap on Import using Secret Recovery Phrase .
-

- 2
- Enter your Exodus 12-word secret recovery phrase with a space betwixt each give-and-take. Set a strong password and tap Import .
-

- 3
- Adjacent, tap the iii bars at the summit left of your screen.
-

- 4
- Tap Settings .
-

- 5
- Tap Networks .
-

- six
- Tap the Add Network button.
-

- 7
- Then, copy and paste these details in the relevant sections:
-
Please note: If yous get the error 'Could not fetch chain ID. Is your RPC URL correct?', instead of 56, please input 0x38.
- Then tap Add .
-

- 8
- Next, tap Add together Tokens .
-

- ix
- You will see you need to notice the Token Accost. To notice the token accost all yous need to practice is:
-
- Open the BSC token list and find the asset yous accidentally sent to and tap information technology.
- Scroll downward and under Profile Summary, y'all will run across Contract. Copy the contract address.
-

- x
- In MetaMask, paste in the contract address in the Token Accost field. The balance of the information will announced automatically. And so click Add Token .
-
 Yous should now come across your BSC tokens appear.
 - 11
-
Please annotation: Y'all'll need some BNB Smart Concatenation BNB in the wallet before yous can move your funds out of MetaMask. We recommend 0.002 BNB as this should exist more than than plenty to embrace all transaction fees for this process. You lot can use Binance to buy BNB. When withdrawing BNB to your MetaMask wallet, please select the BEP20 version of BNB to ship from Binance to Metamask.
- 12
-
Finally, ship your BEP20 funds back to Binance (or the platform where y'all got them), and after that, transport dorsum the BEP20 BNB that yous obtained in step 11.
Once the funds are dorsum in Binance (or the originating platform), delight select the nugget'south proper noun/ticker as the network to withdraw to your Exodus wallet (not BEP2 or BEP20 ).
-
 Yous tin can run across the assets we back up on our status folio. Also, here is how you tin tell which network your token uses.
 - one
- Get to MetaMask's website and download the MetaMask wallet.
- 2
- And so, you'll need to connect your Trezor device to MetaMask using this official guide.
- 3
-
Please note: In the Select an Business relationship screen, delight select the ETH address you sent your BEP20 tokens to. About of the time it will exist the first account.
-
-

- 5
- Open up MetaMask and import your Ethereum private key past clicking on Import Business relationship .
- six
-
Subsequently importing your private key, click on Ethereum Mainnet at the top of the MetaMask wallet screen and select Add Network .
-

- vii
-
Your browser will open a new tab in which you lot tin copy and paste these details in the relevant sections:
-
Please notation: If you get the error 'Could not fetch chain ID. Is your RPC URL correct?', instead of 56, please input 0x38.
-

- Then click Save .
- viii
-
Now please open MetaMask and go to the bottom and click on Import tokens .
-
- nine
-
After y'all click on Import tokens you volition see you demand to find the Token Contract Address . To discover the contract address all you demand to practice is:
-
- Open the BSC token list and observe the asset y'all accidentally sent to and click on information technology.
- Under Profile Summary in the acme right you will see Contract , please copy the contract address.
-

- ten
- Now back in Metamask only paste in the contract address (the residuum of the information should appear by itself). Then click Next .
-

- You should now come across your BSC tokens appear, merely click Add Tokens .
-

- xi
-
Please note: Y'all'll need some BNB Smart Concatenation BNB in the wallet before you can move your funds out of Metamask. We recommend 0.002 BNB as this should be more enough to encompass all transaction fees for this process. You tin can apply Binance to buy BNB. When withdrawing BNB to your Metamask wallet, delight select the BEP20 version of BNB to send from Binance to Metamask.
- 12
-
Finally, send your BEP20 funds back to Binance (or the platform where y'all got them), and later on that, send back the BEP20 BNB that y'all obtained earlier.
Once the funds are dorsum in Binance (or the originating platform), please select the nugget's name/ticker as the network to withdraw to your Exodus wallet (non BEP2 or BEP20 ).
You can see what we back up on our website.

- ane
-
Using a Chromium-based browser like Chrome or Dauntless (Safari will not work) go to the Chrome Web Store. In the top left corner search for the Binance wallet.
-
- 2
- Click on the Binance wallet. From at that place click Add to [browser] to add together information technology to your browser equally an extension.
-
- iii
-
One time done, information technology should look like this in your browser. From here you lot can create a new wallet and get the 12-word secret recovery phrase, click on Create wallet .
-
- 4
-
To view the 12-give-and-take secret recovery phrase of your newly created wallet, click on Generate seed phrase .
-
- v
-
Follow the instructions to create a strong password and click Continue .
-
- 6
-
Write down your 12-discussion secret recovery phrase, and store it in a safety place offline. And then click Continue .
-
- 7
- Now please open up your Binance wallet and click on the push button at the top of the wallet. And then select BNB Beacon Chain Network from the list of iii networks at the lesser of the wallet.
-

- 8
-
Open your Exodus wallet, and open up your BNB wallet that y'all accidentally sent your BNB Beacon Chain (BEP2) asset to.
- nine
-
Please consign your Private Key from the BNB Network wallet within of Exodus. Here's how you lot can obtain your Individual Key: How do I view my private keys?
- 10
-
Open Binance wallet and click on the symbol in the top right corner.
-

- 11
-
This will open up some other menu. Click on Import Account
-

- 12
-
Import your copied private key by pasting it where it says "Paste your Private Key String Here" and then click Import .
-

- 12
-
Y'all'll now see this business relationship in the drop-down carte with the badge Imported. Click on this account.
-

- 13
-
Your BEP2 tokens should now appear.
-

- 14
- If your BNB BEP2 tokens appear delight skip to step 17 beneath. However, if your tokens do not announced you volition need the Asset ID. To find the Asset ID:
- 1. Open the BNB Asset Name list to find the token you sent and click on it.
- 2. Copy the Asset ID.
-

- xv
-
Back in the Binance wallet click the + sign.
-

- sixteen
-
Select Custom Asset . Paste the token'due south Nugget ID in the Asset ID (with suffix) field and the residual of the information volition populate automatically. And then click Add together asset.
-

-
You should at present see your BNB tokens appear.
- 17
-
Yous'll need some BNB Beacon Concatenation BNB (BEP2) in the wallet earlier yous can movement your funds out of the Binance wallet. We recommend 0.002 BNB every bit this should be more than enough to cover all transaction fees for this procedure. Y'all can utilize Binance to purchase BNB. When withdrawing BNB to this BNB Beacon Concatenation wallet, please select the BEP2 version of BNB to send from Binance to the BNB Beacon Chain wallet.
- eighteen
-
Now you'll be able to ship your tokens back to the wallet you sent it from. (such as back to Binance or the platform where you got them) and afterward that, send back the BEP2 BNB.
- 19
-
Once the funds are back in Binance (or the originating platform), delight select the nugget's proper noun/ticker equally the network to withdraw to your Exodus wallet (not BEP2 or BEP20). Yous can follow our guide here Binance to Exodus: Step by Step.
- 1
- First, y'all'll demand to download the desktop version of Exodus here.
- 2
- Now you will need to link your mobile wallet to the desktop wallet yous only downloaded. To do this please read this guide.
- iii
- The rest of the instructions are the same every bit above in the BEP2 token sent to Exodus Desktop section.
Part 3: Adding a custom token to the Binance wallet (if needed)
Office iv: Sending your BSC funds out of your Binance wallet
BEP20 token sent to Exodus Mobile
To retrieve your Binance BEP20 avails will crave the use of a desktop reckoner and Binance wallet.
If you lot practise not take admission to a trusted estimator, you tin can recollect your Binance BEP20 assets with your 12-word clandestine recovery phrase and the MetaMask mobile app.
This process is only recommended if y'all practise not accept a trusted desktop estimator, as information technology exposes your Exodus 12-word undercover recovery phrase. Desktop methods only utilise the individual key of i asset, which is far more than secure. You can read more nearly the risks of using your 12-word secret recovery phrase here: Using the 12-word underground recovery phrase.
BEP20 token sent to Trezor
To retrieve your Binance BEP20 assets will require the use of your Trezor hardware wallet, a desktop computer, and MetaMask, but information technology only takes a few minutes!
BEP2 token sent to Exodus Desktop
Retrieving your Binance BEP2 avails will require the use of a desktop calculator and the Binance wallet browser extension.
BEP2 token sent to Exodus Mobile
To retrieve your Binance BEP2 assets volition require the apply of a desktop estimator and the Binance wallet.
Source: https://support.exodus.com/article/1495-binance-network-troubleshooting
0 Response to "Binance Network Unavailable"
Post a Comment